How To Connect Yealink SIP Phones to Teams
Microsoft Teams allows your organization to leverage any compatible SIP device through its SIP Gateway. This approach helps preserve your investments in existing SIP devices. Before delving into the details of how to connect your Yealink SIP phone to Teams, lets uncover the key benefits of SIP Gateway:
- Sign-in with Corporate Credentials: You can sign in to Teams using your corporate credentials and make and receive calls with a compatible SIP device.
- Calling Features: Compatible SIP devices can:
- Make calls to the Public Switched Telephone Network (PSTN), other SIP devices, and Teams/Skype for Business users.
- Receive calls from the PSTN, Teams/Skype for Business users with SIP devices, and Teams/Skype for Business applications.
- Multiple Simultaneous Calls: SIP device users can handle multiple calls, put calls on hold, and conference calls.
- Hold/Resume and Mute/Unmute: Users can manage calls using device features.
- Voicemail: SIP device users can listen to electronically stored voice messages.
- Message Waiting Indicator: Notifications alert users about new voicemail messages.
- Sign-in and Sign-out: Users can sign in and out of Teams on their SIP devices.
- Dual-Tone Multi-Frequency (DTMF): Users can input numbers during interactive voice response calls.
Step 1: Verify SIP Gateway Availability
- Sign in to the Teams admin centre.
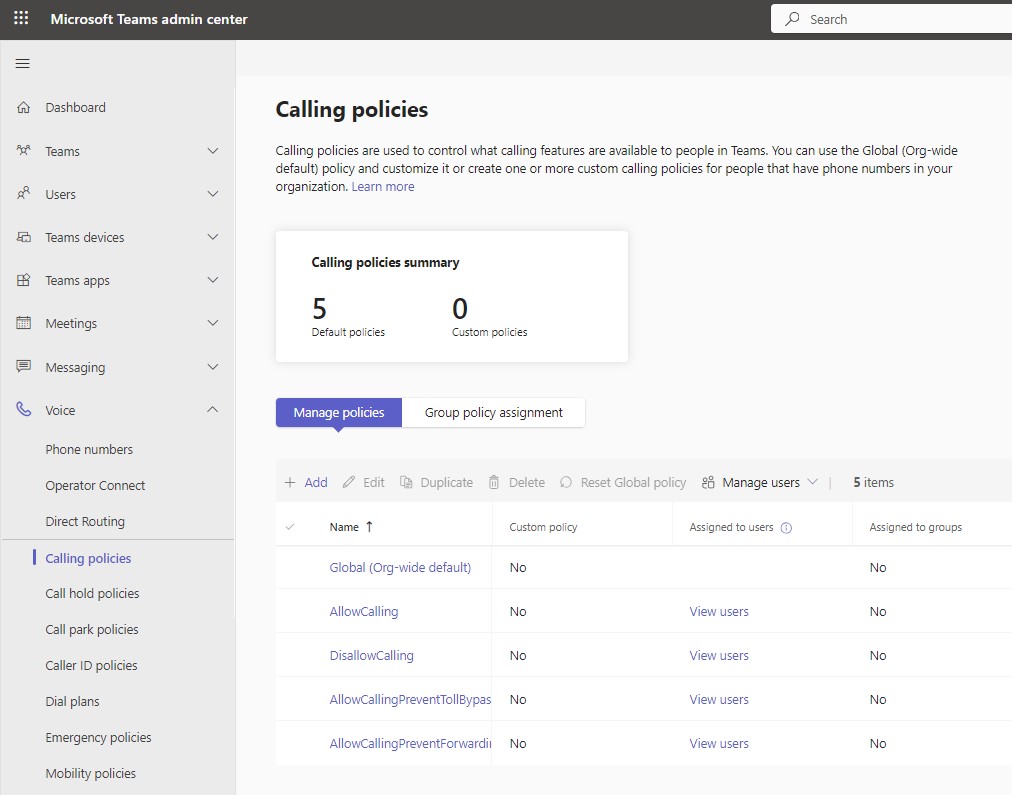
- Check if the “SIP devices” tab is visible under “Teams devices.” If it is then SIP Gateway is already enabled for your organization – skip to step 3.
Step 2: Enable SIP Gateway
- You can enable SIP Gateway either through the Teams admin center or PowerShell:
- Teams Admin Center.
- Navigate to the Teams admin center.
- Under “Voice,” select “Calling policies.”
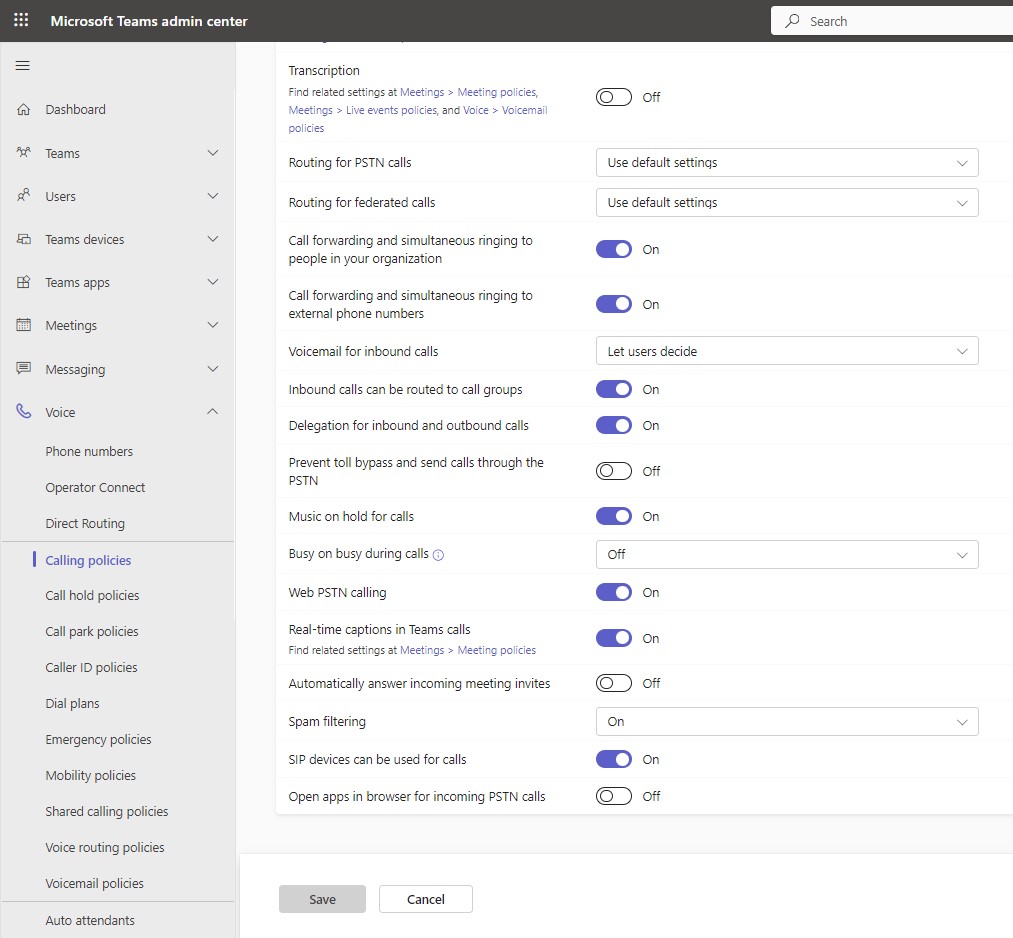
- Choose the appropriate calling policy assigned to users (or create a new one) and turn on the setting for “SIP devices can be used for calls.
- PowerShell Use the Set-CsTeamsCallingPolicy cmdlet to enable SIP Gateway.
Step 3: Reset SIP Devices to Factory Defaults
- Each SIP device must be reset to its factory default settings. Refer to the manufacturer’s instructions for specific steps.
Step 4: Provisioning via DHCP or Manually
There are three provision URLs for each region; EMEA, Americas, APAC;
- EMEA: http://emea.ipp.sdg.teams.microsoft.com
- Americas: http://noam.ipp.sdg.teams.microsoft.com
- APAC: http://apac.ipp.sdg.teams.microsoft.com
Choose the appropriate URL and configure manually or via DHCP and then reboot the phone.
DHCP:
- Set the provisioning server URL via DHCP options (e.g., option 66 or 160). Devices will automatically retrieve configuration from the specified server.
Manual Provisioning:
- Manually configure the provisioning URL on each SIP device using its web interface or admin settings.
Step 5: Setting Date and Time
- Web GUI
- Access the SIP device’s web interface (usually via its IP address).
- Navigate to the date and time settings section.
- Set the correct date, time, and time zone.
- DHCP
- Some devices can obtain date and time information via DHCP options (e.g., option 42).
Step 6: Changing Default Admin Password
- For security reasons, change the default admin password on the device:
- Access the device’s web interface.
- Locate the password settings (often under “Security” or “Admin”).
- Set a strong, unique password.
Looking for further help? At Yellowgrid, we have a helpful and knowledgeable support team ready to answer all your questions. Contact us today.


