How-to Remotely Provision A Fanvil Phone on 3CX
This blog should enable you to remotely provision a Fanvil phone confidently.
This video shows you how to remotely provision a Fanvil phone on 3CX. It will show you step by step how to auto provision and manually provision a Fanvil phone on 3CX with detailed examples. It also provides you with solutions if you are still struggling to provision a Fanvil phone with 3CX, another reason why we recommend you watch this video.
For those who prefer written instructions:
An explanation of the 3CX diagram
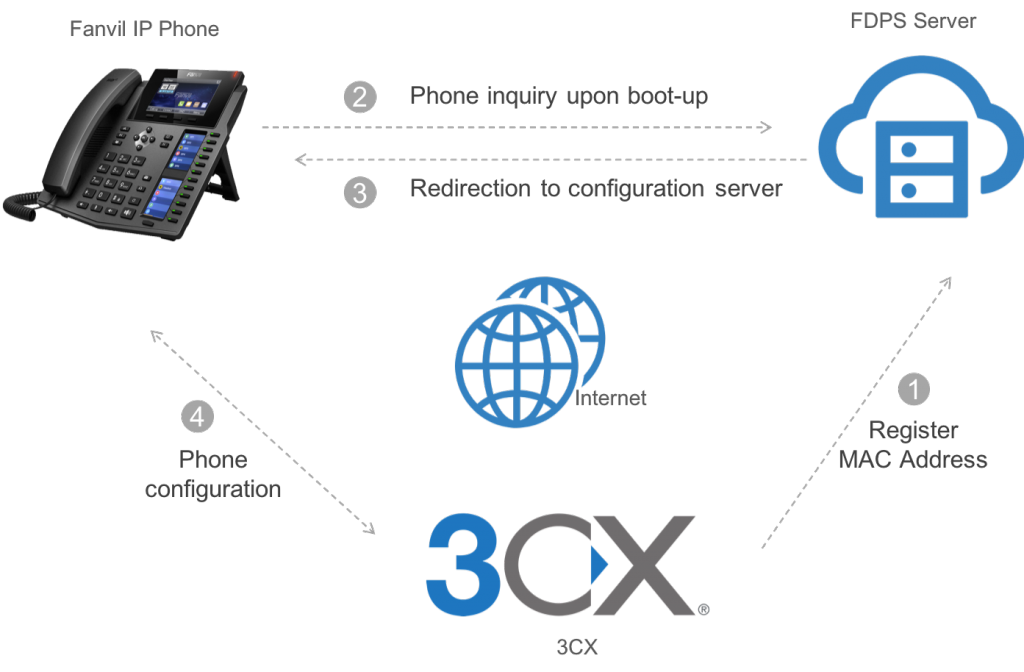
All Fanvil phones are fully supported by 3CX.
3CX natively supports the Fanvil FDPS server therefore, when a Fanvil MAC address is added as a remote STUN extension, 3CX automatically sends provisioning information to the Fanvil FDPS server. By doing this, when the Fanvil phone boots it will contact the FDPS server which will respond with the provisioning information provided by 3CX. Once the Fanvil phone has this information, it will then contact 3CX directly and download its configuration.
Auto provisioning
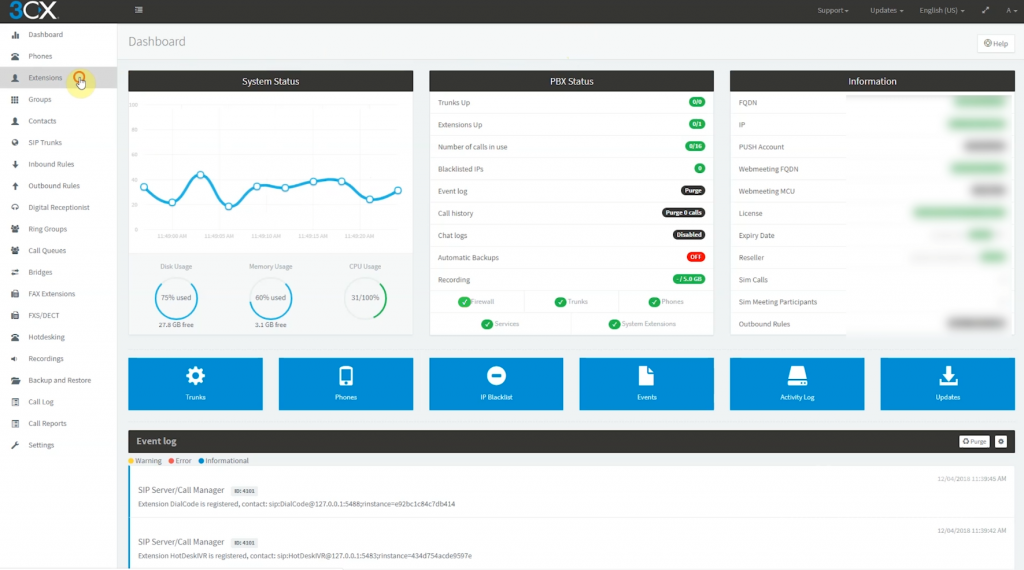
- Firstly go to your 3CX web console. Then go to ‘extensions’ (screenshot above).
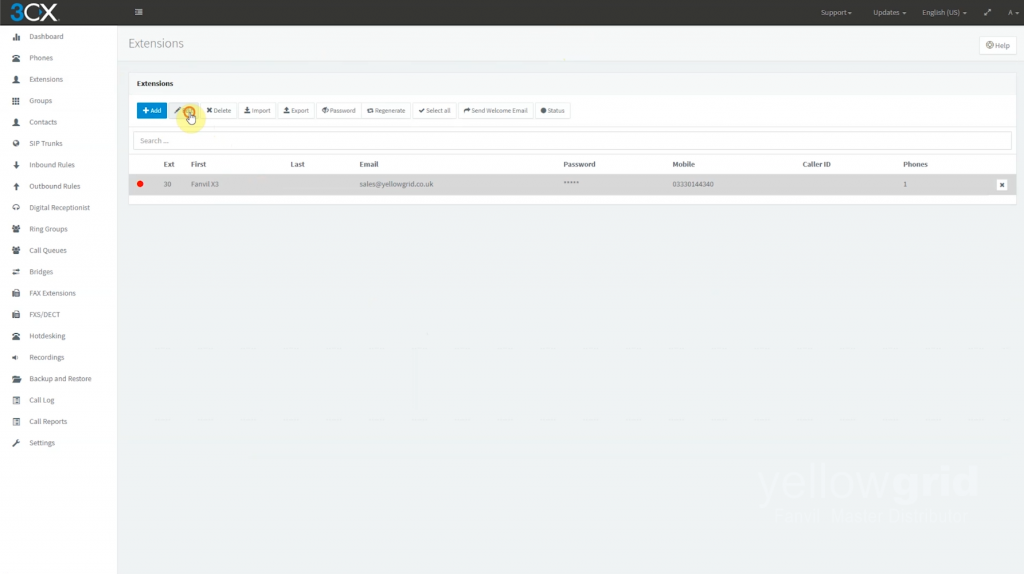
- Once you are in ‘extensions’ you need to edit the relevant extension.
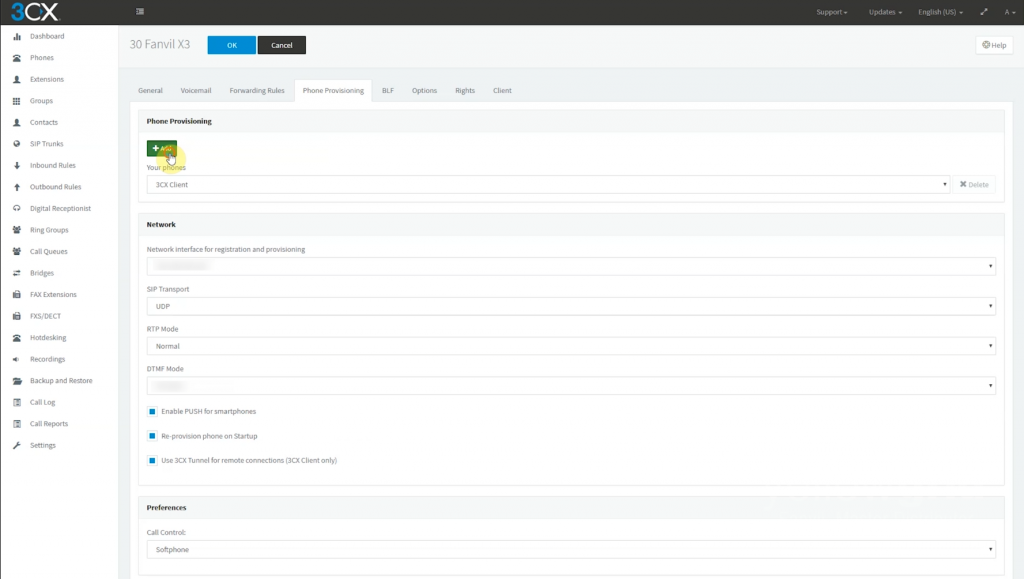
- Once you have clicked ‘edit’. This screen should appear. Go to ‘phone provisioning’ and click ‘add’.
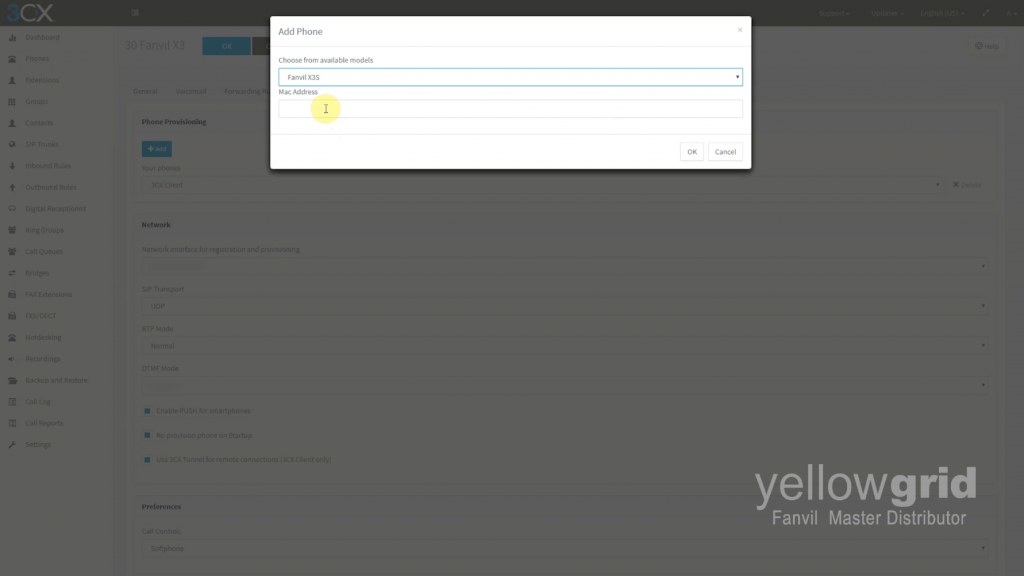
- You need to now choose the model of your Fanvil phone and then enter the MAC address. Click ‘ok’.
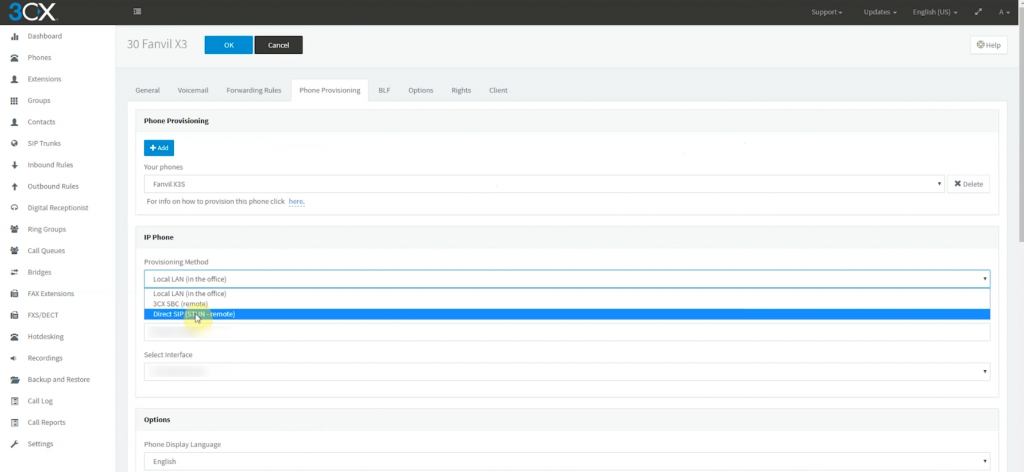
- Now change the provisioning method to ‘direct SIP’ (STUN remote). Once you have done this click ‘ok’ to apply.
It is worth noting that for every remote extension you add, you will need to increment the SIP and RTP ports accordingly.
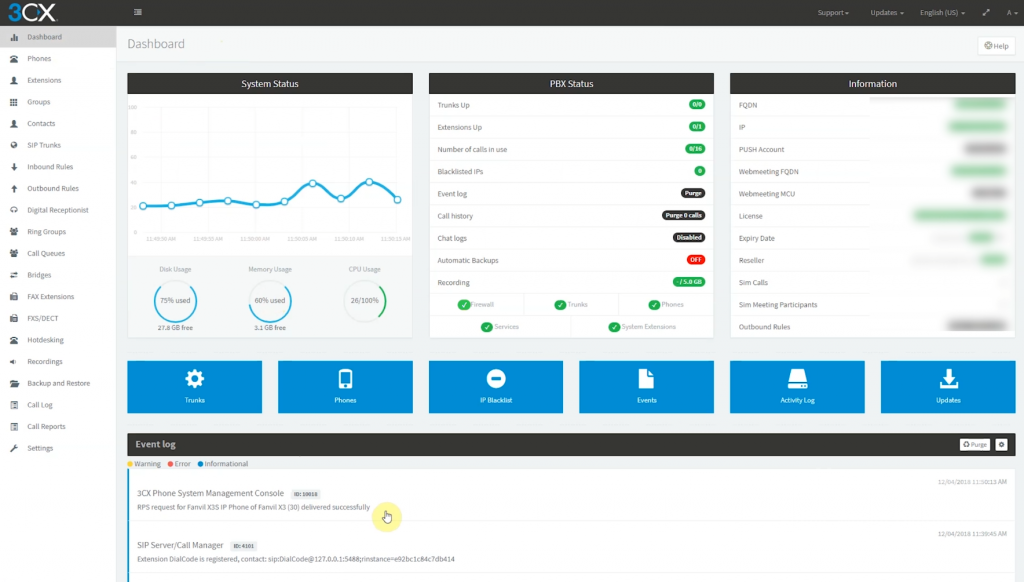
- If you return to the 3CX dashboard you should see the successful RPS request in the event log, located at the bottom of the screen.
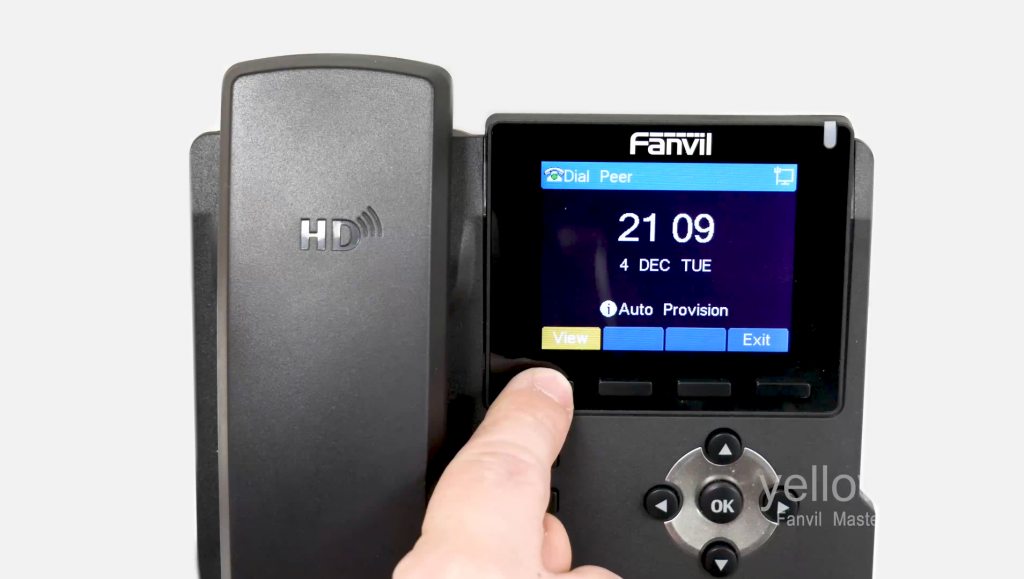
- Now plug in your Fanvil phone, it may reboot a number of times before it reaches the auto provision screen. Once you see this screen press ‘view’.
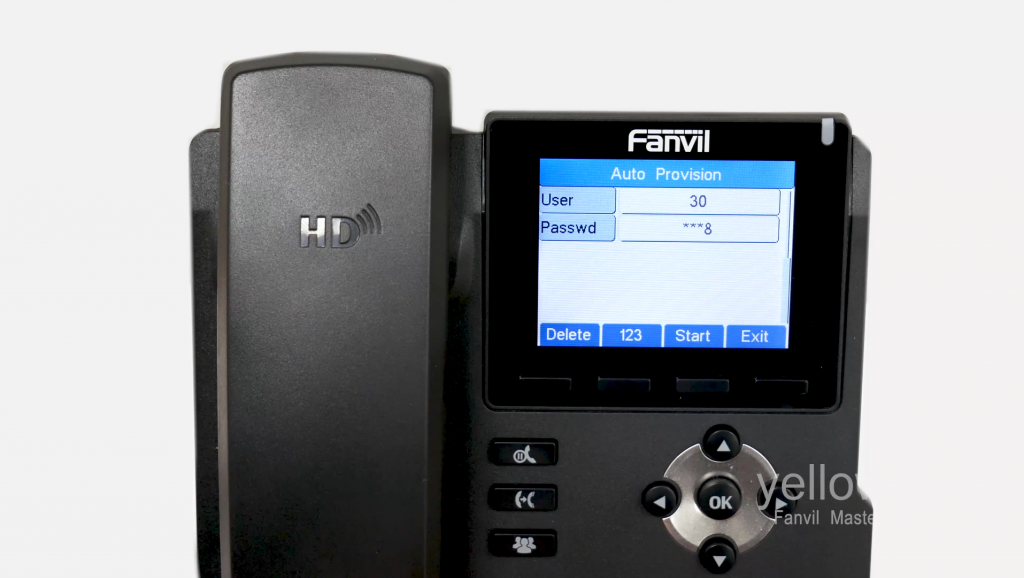
- Now that you have clicked ‘view’ this screen should appear. In ‘user’ enter your extension number and in ‘password’ enter the extension voicemail pin.
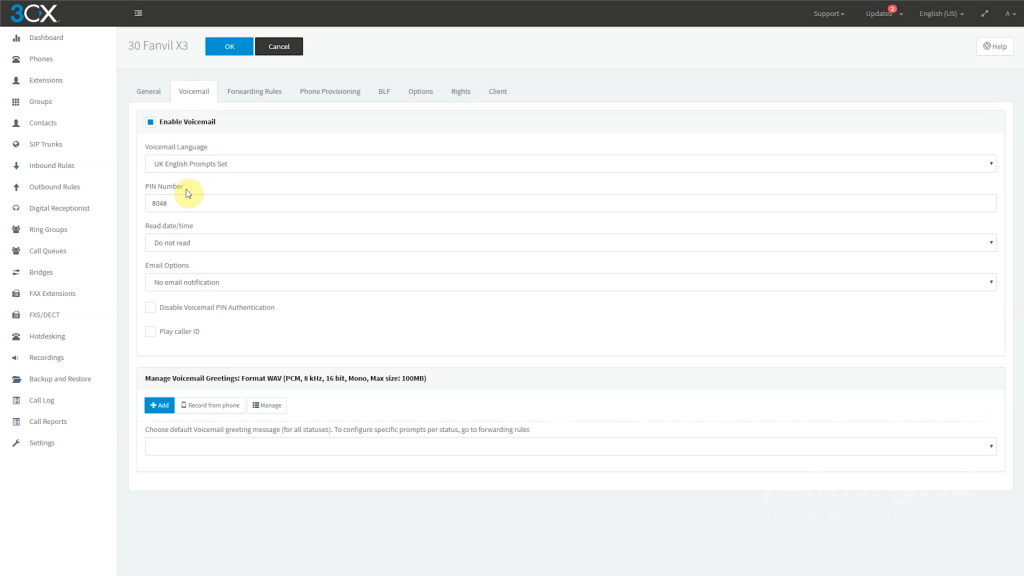
- You can get the voicemail pin by going to the ‘extensions’ in 3CX then ‘voicemail’ and you will see the pin number.

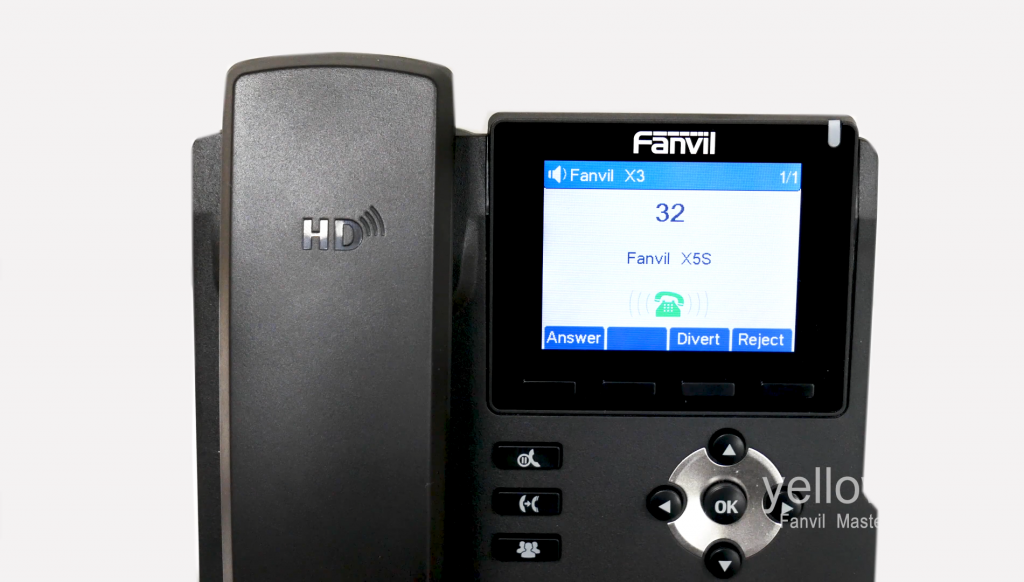
- Once you have entered this information, press ‘start’. The phone will then begin to download its configuration and it will reboot. Once the phone has finished rebooting, it will now be registered.
Manual provisioning
If for whatever reason the RPS request fails, you will have to manually provision your Fanvil phone. The following instructions will show you how to do this.
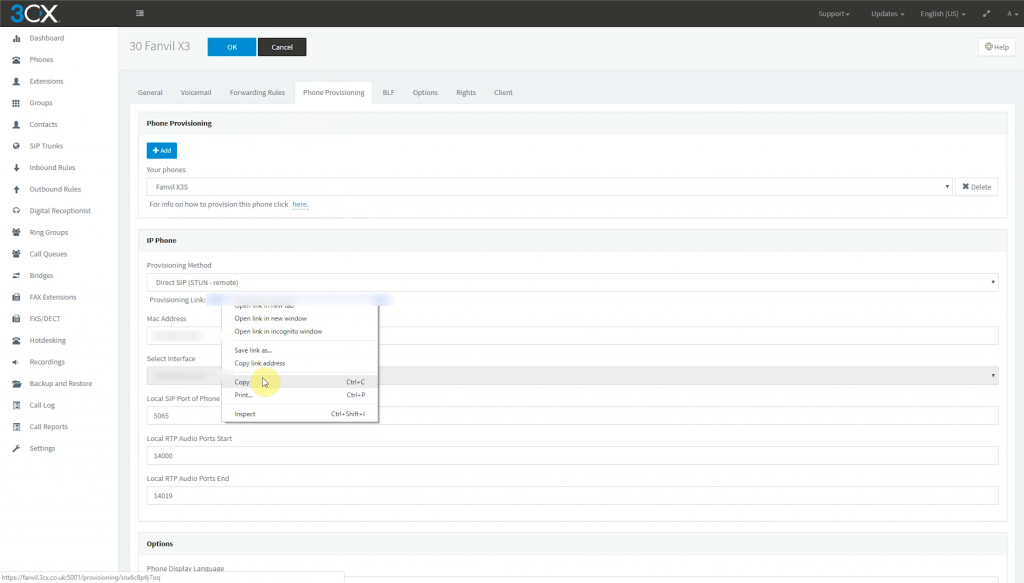
- Firstly go to the ‘extension’ in 3CX – then ‘phone provisioning’ and copy the provisioning link.
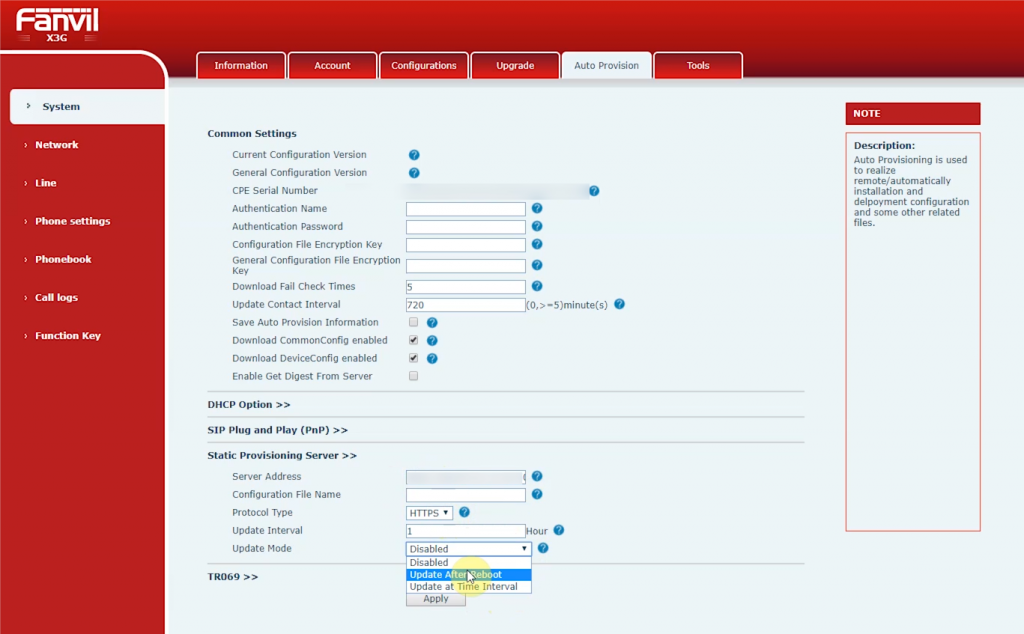
- Then go to the web interface of your Fanvil phone. Go to ‘auto provisioning’ – ‘static provisioning server’ and paste the provisioning link in the server address. Once you have done this, change the ‘protocol type’ to https and change the update mode to ‘update after reboot’. Click ‘apply’ and reboot the phone.
If you still experience any problems, it’s worth noting that if DHCP option 66 is in use on your network then disabling this option on your phone will resolve this issue. Additionally, if there is another PBX like 3CX on the LAN, you’ll also need to disable SIP plug and play.
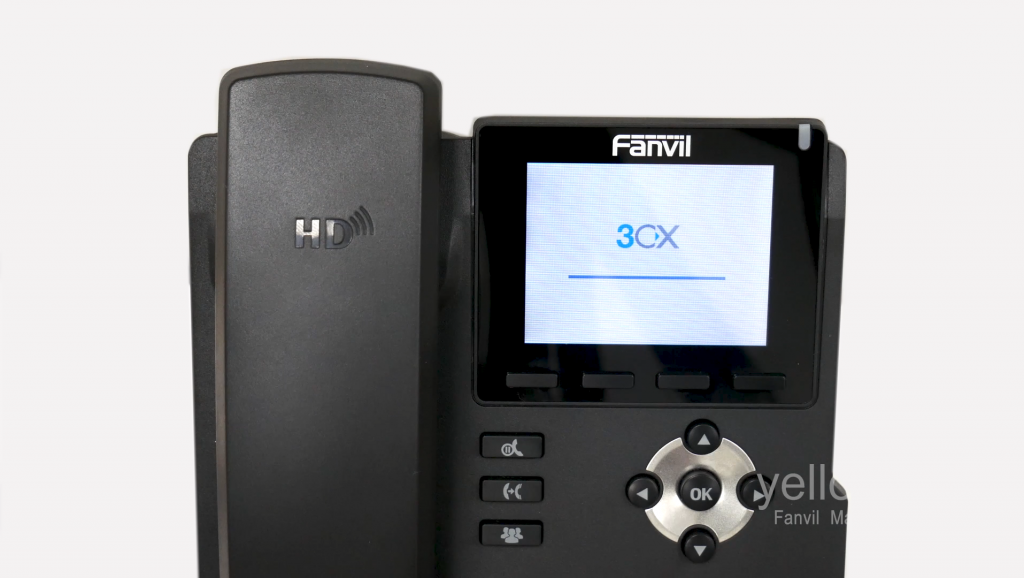
- The phone should then contact 3CX and download its configuration (the phone may reboot a number of times). Once it has finished this process the phone will be registered.
If you are still having trouble remotely provisioning a Fanvil phone on 3CX, please do not hesitate to give our office a call on 0333 014 4340 and one of our experts will be happy to help!
Yellowgrid values their audiences opinions. Please take a moment to complete this short questionnaire !
