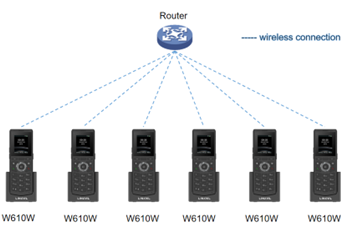
Provisioning Fanvil W611W Devices via Wi-Fi in Volume
A Wi-Fi phone needs to be connected to a Wi-Fi network before it can connect to a provisioning server. This could take a lot of time and effort to connect each device manually. This blog will introduce you to a new feature ‘Share Wi-Fi‘ which will allow you to connect multiple devices in batches.
Share Wi-Fi will allow a device to share its SSID and password credentials automatically to neighbouring devices once Share Wi-Fi has been enabled.
Scenario 1: Configure Special SSID for Wi-Fi Connecting
Step1: Check firmware supports share Wi-Fi function and reset all devices. – (If the device supports share Wi-Fi function, skip step1)
Step2: Create a Wi-Fi with an SSID of Wi-Fi-device-SSID and a password of I<0%aY8+ on the router.
Step3: Do DHCP option66 auto provision on the router and get the configuration file through DHCP option66 –
- Turn on the DHCP option 66 auto provision feature on the router
- Configure a configuration file containing new WIFI information and SIP account information, and the name is mac address as the file name, e.g. 0C383E5F1A63.cfg
- Open the auto provision server, e.g. 192.168.1.122
- Open the DHCP server, open dhcpsrv.ini, and add a DHCP option custom field, e.g. OPTION_66=http://192.168.1.122:663/0C383E5F1A63.cfg
Step4: Wait for the device to connect to the special SSID.
Step5: After connecting to Wi-Fi, you can provide new Wi-Fi and other configurations to device
Please note, after completing the above steps, the device will get a new Wi-Fi convenience credential to connect to the new Wi-Fi and the Wi-Fi set on the router can be deleted.
Scenario 1: Configure One Device and Share Wi-Fi Information
Step1: Upgrade the firmware supports share Wi-Fi function and reset all devices. – (If the device firmware supports share Wi-Fi function, you could skip step1.
Step2: Do DHCP option66 auto provision on the router and get the configuration file through DHCP option66 –
- Turn on the DHCP option 66 auto provision feature on the router
- Configure a configuration file containing new WIFI information and SIP account information, and the name is mac address as the file name, e.g. 0C383E5F1A63.cfg
- Open the auto provision server and put the configuration file to be downloaded in the corresponding directory of the server. E.g. IP address 192.168.1.122
- Open the DHCP server, open dhcpsrv.ini, and add a DHCP option custom field, e.g. OPTION_66=”http://192.168.1.122:663/0C383E5F1A63.cfg”
Step3: Enable Share Wi-Fi and configure the Wi-Fi information via lcd, which in Menu–Advanced–Share Wi-Fi.
- Enable Share Wi-Fi
- Input SSID want to connect
- Select Security Mode
- Input Password
- Click ‘OK’ to save the configuration file, it will prompt ‘Config OK!’
- Press Red hang up button to return desktop
Step4: The device could share the Wi-Fi information to Share Wi-Fi client, and the client could connect to the Wi-Fi automatically
Please note, the client needs to be within the coverage range of Router and if multiple devices enable Share Wi-Fi, the client will connect to Wi-Fi using the information obtained first. Clients will connect to Router directly with Wi-Fi configuration
Step5: After connecting to Wi-Fi, you could provide new Wi-Fi and other configurations to the device.
Please note, disable ‘Share Wi-Fi’ if needed.
Please download the manual for full instructions and alternative methods of automating Wi-Fi using this technology.


